GitHub for Non-programmers
This guide will take you through contributing to brownbook step-by-step, assuming you have never used GitHub before. It is over-explanatory by design, and takes you from making a GitHub account to making your first pull request with your contributions. It only follows the “happy path” but should not hit any errors. If you get stuck ask the controls team for help!
Your first contribution
Make a GitHub account
Go to the GitHub homepage and make an account using the “Sign Up” button in the upper right.
We suggest creating your account with a professional-sounding username - you may use this in the future in your life!
To continue further, contact the controls mentors to get your user account added to the frc1675 organization.
Fork brownbook
Next, you will need to fork, or make your own copy of, the brownbook repository. You can do this by going to the brownbook repository page and clicking the Fork button in the upper right corner.
Whatever the default options are for the fork should be fine. This will create a brownbook repository under your user and should leave you on its page. You can always get back to it by clicking your picture in the upper right corner and clicking “Your repositories”.
Set up GitHub pages for your brownbook
Next, we will set up your repository to build and display your repository data as GitHub Pages, just like brownbook does, so you can check your changes as you work.
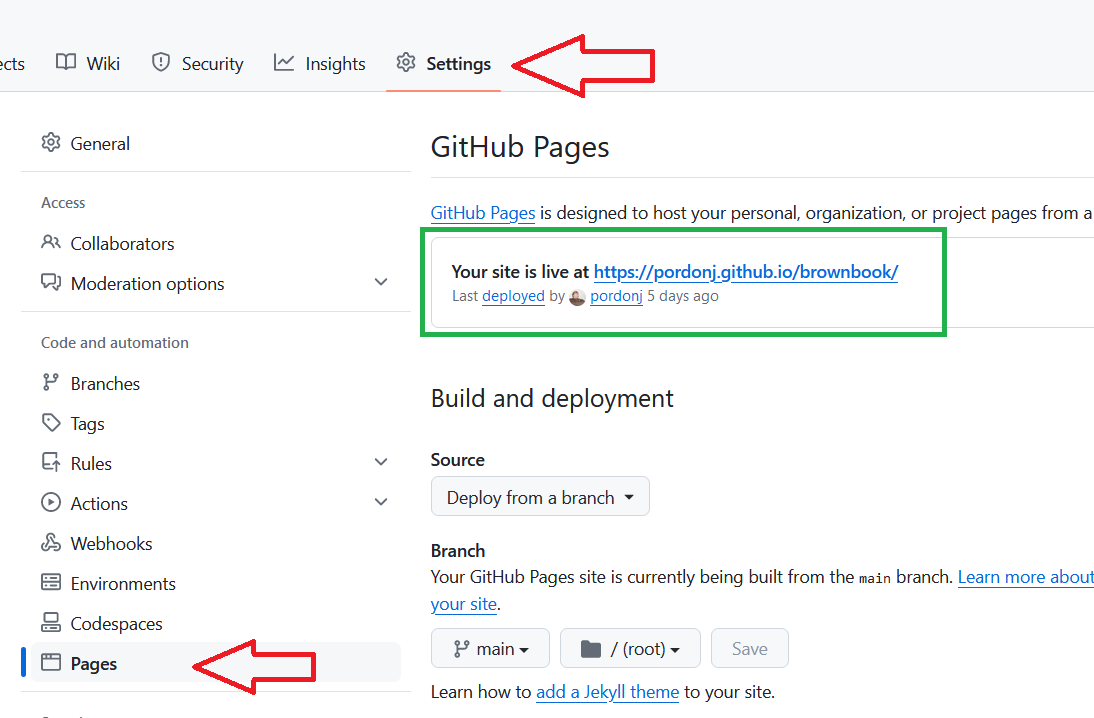
Go to the Settings tab of your repository and select “Pages” on the left.
Match your settings with those in the picture above - namely “Deploy from a branch” and selecting “main” and “/ (root)”, then click the Save button. The site deployment confirmation in the green box will only appear after your site has been deployed.
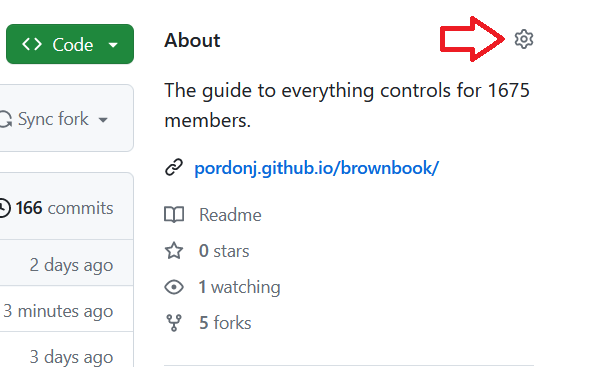
Go back to the default (Code) tab of your repository and hit the gear in the About section on the left side.
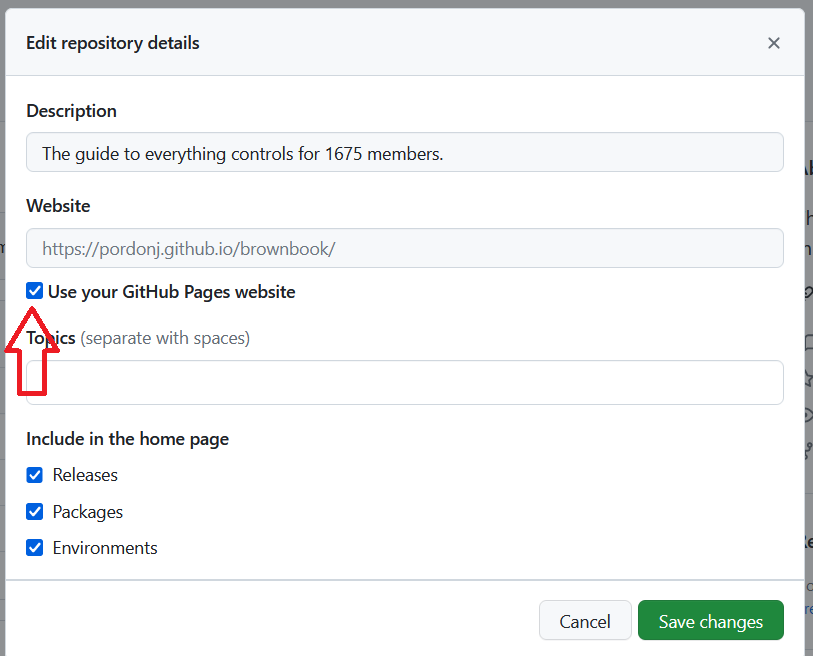
Check the checkbox in this dialog to “Use your GitHub Pages website”.
Now the About section will always have a link for you to go directly to your GitHub Pages for your brownbook fork.
Open the editor
For any editing beyond small changes in 1 file, we recommend using the GitHub web editor feature.
To open the web editor in GitHub press the . (period) key while in your repository.
This will load a page which runs a text editor in the cloud for you to use through your browser. It autosaves your changes as you work.
Make changes
The content of brownbook is written in Markdown. You can find a guide of how to do Markdown formatting here. You can also look at the other files in brownbook for examples or lean on other brownbook contributors to help you get started. All new content should follow the brownbook standards.
You can make new files and directories using the buttons here near the top of the file list. The buttons will appear when you mouse over the area or have something selected in the explorer.
If you’re making a new Markdown file, end the name with .md.
You can’t cause any (permanent) damage, or any damage to the main brownbook, so feel free to experiment.
Preview your changes
Brownbook uses GitHub Pages that are generated from Markdown, but you can preview your files to see how Markdown is formatting them. Click this icon near the top of the editor to see a Markdown preview pane.
Commit and push
Once you are happy with some changes they need to be moved into your brownbook repository.
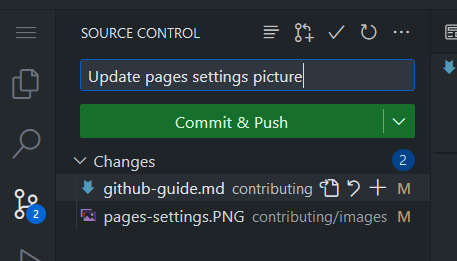
After previewing your changes, click the Source Control icon on the left side bar (4th from the top) and the file explorer will go away and show you source control operations. Write a brief descriptive message in the text box above the Commit & Push button. Click the “Commit & Push” button to commit all staged changes and push them to your repository. By default, all changes made are included. Each commit is a set of changes that can easily be reversed or applied to another repository.
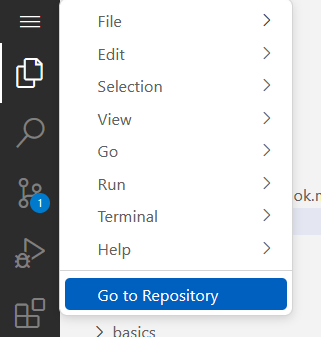
Once you have finished you can return to your repository by clicking the menu in the upper left and selecting “Go to Repository”.
View changes on GitHub Pages
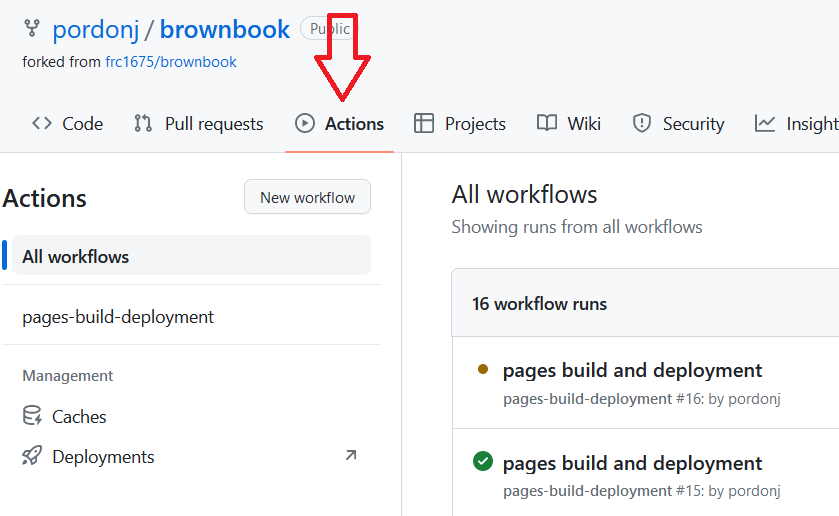
Once your commits are pushed to your brownbook repository, GitHub will process your repository data and generate GitHub Pages. You can watch the progress of this on the Actions tab of your repository page.
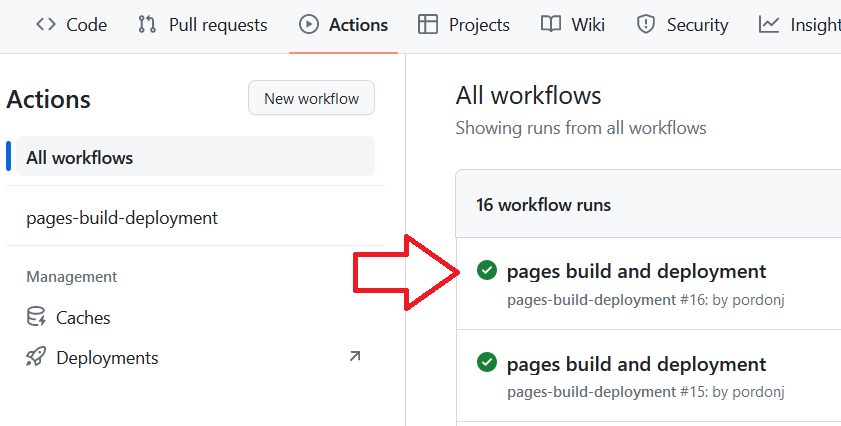
It won’t take very long. This is what it will look like when the page generation is complete.
Once page generation is complete you can look at your changes in GitHub Pages through the link we set to show on the Code tab of your repository page. Click around, make sure your changes look as you like and that all images and links work correctly.
Iterate your changes
Continue through the change, preview, commit, push, check steps until you are happy with your content. Make sure it meets the brownbook standards!
Make a pull request
The final step is creating a pull request to the main brownbook repository. The name sounds backwards because it means you are “requesting” the other repository to pull your changes in.
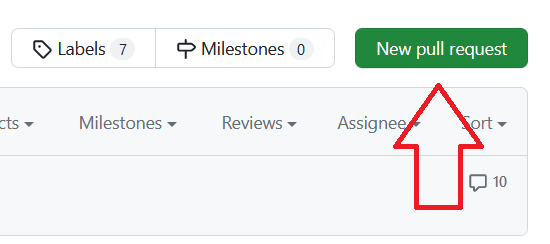
Go to the main brownbook repository, go to the Pull Requests tab at the top, and click the green “New pull request” button on the right of the page.
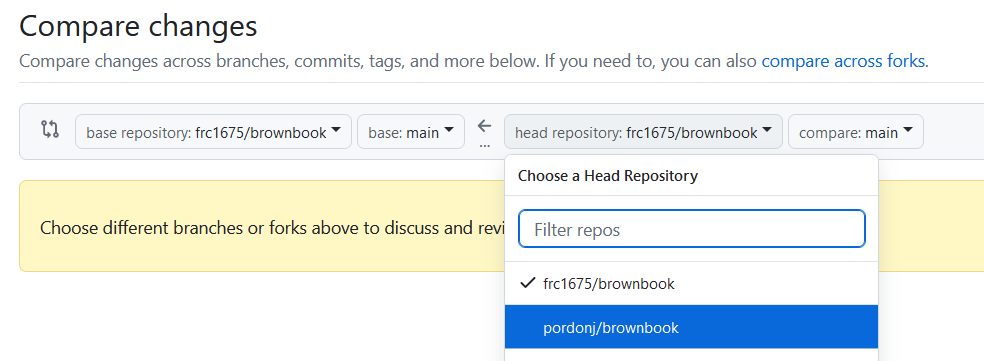
Your changes are in your fork, so you need to click this link to compare across forks.
Choose your fork to be the head repository.
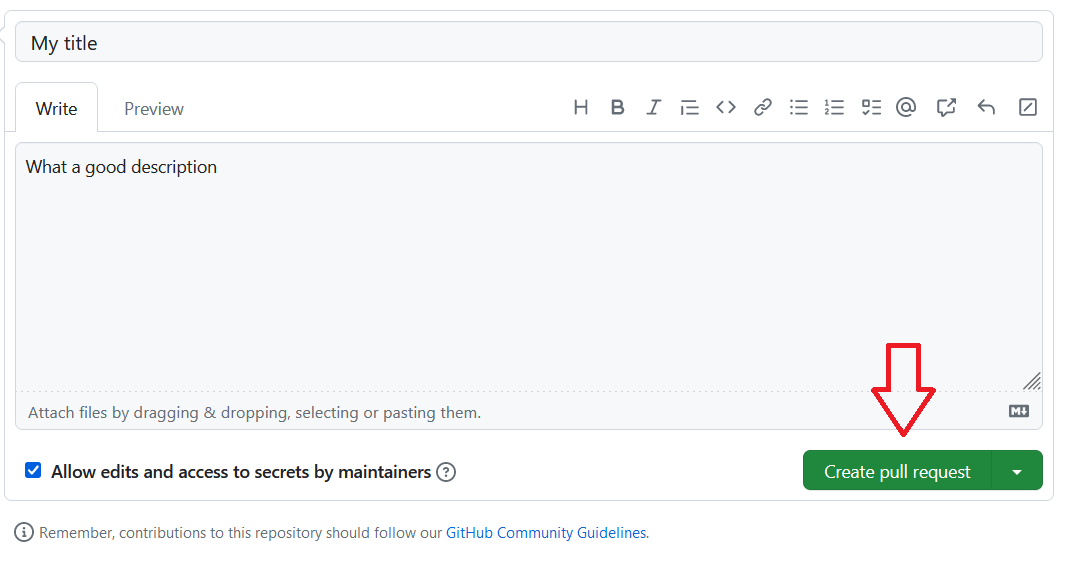
After selecting your fork, the page should auto-populate with all the changes between your fork and the main brownbook repository. At this point you can click the green button to create the pull request.
It will open a form for you to fill out. Write a title and description for your pull request and click the green button to create it.
You have formally requested your changes be moved into brownbook! At this point some number of brownbook contributors will review your changes, which may need additional changes before being merged in.
Future contributions
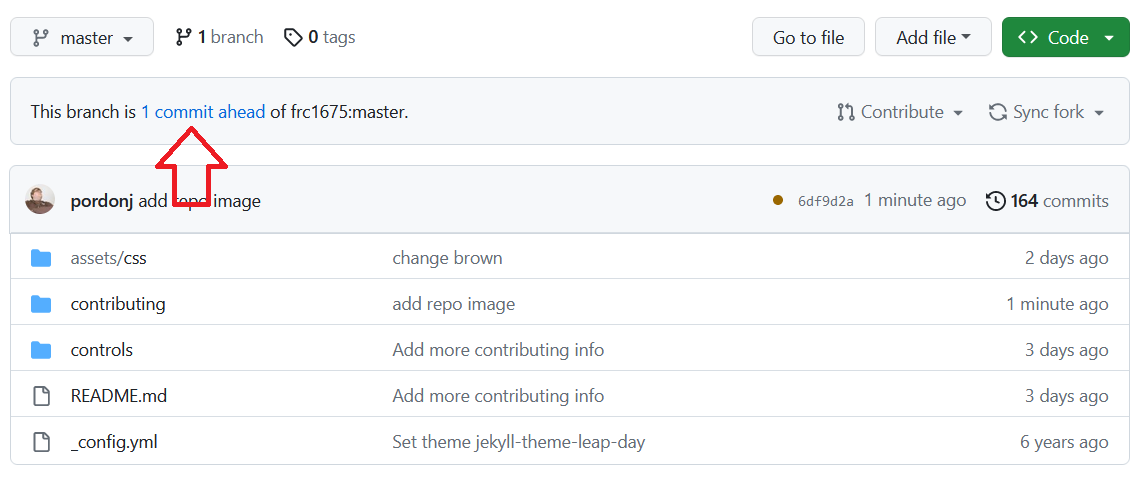
Any time you go back to your brownbook fork to make more changes to contribute, it may be “out of sync” with the main brownbook because of content added. You can see this on your fork page in this area.
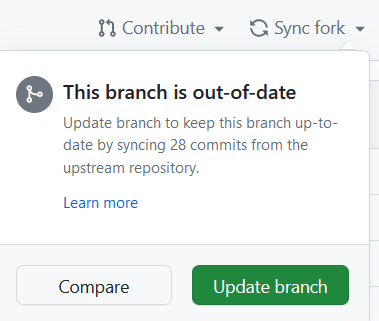
If it says your repository is ahead it means you have commits that haven’t been merged. If your repository is behind it means there is content that you don’t have. If you are any commits behind you can click this under “Sync Fork” button to sync automatically.
We use what are called “squash commits” to keep the main repository clean. All it means to you is that you should sync before starting each portion of new work.
If your brownbook repository somehow gets to a state which displays as both some number of commits ahead and behind, let Josh know and he can help you resolve it.


